(Last Updated on September 23, 2026 by Henry)

Improve Wrist Movement, & Keep Training More Comfortably

Wrist mobility is an important but sometimes overlooked part of grip training.

While many people focus on squeezing harder, lifting heavier, or improving finger strength, the wrist also plays a major role in how force is produced, transferred, and controlled.

Your wrists help position the hand during crushing, pinching, pulling, hanging, lifting, and rotational exercises.

They also contribute to everyday activities such as typing, gaming, carrying objects, and working with tools.

When wrist movement becomes restricted or uncomfortable, you may find yourself changing your technique, avoiding certain positions, or relying more heavily on other parts of your arm.

That does not mean every stiff wrist indicates a problem or that everyone needs an extensive mobility routine.

However, learning how to move your wrists through a comfortable, controlled range can support better movement awareness and complement a balanced grip training program.

In this guide, we will look at what wrist mobility means, how it relates to grip training, practical movements you can explore, and ways to include mobility work without turning it into another demanding workout.

1. What Is Wrist Mobility and Why Does It Matter?

1. What Is Wrist Mobility and Why Does It Matter?

Flexibility generally refers to how far a joint or muscle can be moved, often with external assistance. Mobility is a broader concept that includes your ability to actively control movement through a usable range.

Mobility Is More Than Flexibility

For grip training, this distinction matters. You may be able to move your wrist into a certain position passively, but that does not necessarily mean you can control that position comfortably while holding a weight, gripping a handle, or performing a rotational movement.

Useful wrist mobility involves several factors:

  • The available range of movement.
  • Your ability to control the movement.
  • Your comfort and confidence in different positions.
  • The strength and coordination required to use that range during an activity.

The goal is not to force your wrists into extreme positions. Instead, it is to develop movement that is controlled, practical, and appropriate for your current abilities.

How the Wrist Supports Grip Training

The wrist connects the movement and force produced by the hand with the forearm and the rest of the arm. Its position can influence how comfortably you perform different grip exercises.

During crushing exercises, for example, the wrist may help stabilize the hand while the fingers close around a gripper. During pinch training, the wrist and forearm contribute to maintaining control while the thumb and fingers apply pressure. Support grip exercises, such as carrying weights or hanging from a bar, also require the wrist to tolerate and manage load.

Rotational exercises involve additional movement. Pronation and supination allow the forearm and hand to turn, which is relevant to activities such as arm wrestling, using tools, and manipulating objects.

A mobile wrist is not automatically a stronger wrist, and more movement is not always better. The most useful range is the range you can control and use effectively for your activity.

2. How Limited Wrist Mobility Can Affect Your Grip

2. How Limited Wrist Mobility Can Affect Your Grip

Your wrist does not work in isolation. Its position influences how your fingers, hand, and forearm interact during gripping tasks.

If a particular wrist position feels restricted, you may unconsciously adjust your technique. You might change the angle of your hand, shift the load toward another part of the arm, reduce your range of motion, or avoid an exercise altogether.

Wrist Position and Grip Mechanics

These adjustments are not necessarily harmful. Adapting movement is a normal part of learning and responding to your body’s current capabilities. Problems can arise when you repeatedly rely on uncomfortable positions, ignore persistent symptoms, or increase training demands faster than you can adapt.

The relationship between wrist position and grip mechanics also depends on the exercise. A position that feels useful during a controlled wrist curl may not be appropriate during a heavy carry, a hang, or a rotational movement. Mobility work should therefore support the demands of your chosen activities rather than follow a single ideal wrist position.

Everyday Signs You May Need More Mobility Work

You may notice that your wrists feel stiff or restricted after extended periods of typing, gaming, driving, lifting, or manual work.

Some people also notice differences between their left and right wrists or find that certain movements feel less natural after a long period of inactivity.

Possible signs worth paying attention to include:

  • Feeling restricted when gently bending the wrist forward or backward.
  • Difficulty finding a comfortable wrist position during warm-ups.
  • Reduced confidence when moving the hand through unfamiliar angles.
  • Stiffness after prolonged gripping or repetitive hand activity.
  • A noticeable difference in movement between the two wrists.

These observations do not establish the cause of the restriction. Stiffness may be related to recent activity, general inactivity, previous injury, training load, or other factors. Persistent pain, swelling, numbness, tingling, unusual weakness, or loss of function should not be treated as a simple mobility limitation.

In those situations, seek an assessment from a qualified healthcare professional rather than attempting to resolve the issue through increasingly aggressive stretching.

3. Practical Wrist Mobility Exercises for Grip Training

3. Practical Wrist Mobility Exercises for Grip Training

Wrist mobility work does not need to be complicated. For many beginners, a few gentle and controlled movements are enough to develop awareness of how the wrists move and respond.

Start with a comfortable range of motion and avoid forcing the wrist toward a position that causes pain. Move slowly enough that you can notice how the joint feels rather than relying on momentum.

Gentle Wrist Flexion and Extension

Wrist flexion involves bending the hand forward, while wrist extension involves moving the back of the hand toward the forearm.

You can explore these movements while seated or standing:

  1. Relax your shoulders and keep your forearm supported if needed.
  2. Slowly move your hand forward into a comfortable flexed position.
  3. Return to a neutral position.
  4. Slowly move the hand backward into a comfortable extended position.
  5. Return to neutral and repeat several times.

The movement should remain controlled. You do not need to reach the furthest possible position to benefit from practicing the motion.

If the wrist feels more restricted in one direction, avoid forcing it to match the other side. Work within a manageable range and pay attention to how the wrist responds during and after the movement.

Wrist Circles and Controlled Movement

Wrist circles provide a simple way to explore several directions of movement in one exercise. They can be useful before training, during a break from repetitive activity, or as part of a light recovery routine.

Begin with small circles and gradually make them larger only if the movement remains comfortable. Keep the motion slow enough to avoid swinging the hand or using unnecessary momentum.

You can also reverse the direction of the circles to explore the movement more evenly.

Wrist circles should not become a competition to create the largest possible circle. The purpose is controlled movement and awareness, not forcing the joint through an extreme range.

Pronation and Supination Movements

Pronation and supination involve turning the forearm and hand. In a simplified example, pronation turns the palm downward, while supination turns the palm upward.

Practice this with your elbow close to your side & bent at a right angle:

  1. Start with your palm facing upward or toward a neutral position.
  2. Slowly rotate the forearm until the palm faces downward.
  3. Return to the starting position.
  4. Repeat the movement in a controlled manner.

Keep the elbow relatively still so that the movement comes primarily from the forearm rather than from swinging the entire arm.

This movement is particularly relevant to rotational grip training, but it also appears in many everyday tasks. Start without added resistance.

Once the movement feels comfortable and controlled, you can consider how it relates to the specific demands of your training.

Gentle Loaded or Assisted Mobility

Some people eventually include light resistance or assistance in their mobility work. This is not necessary for every beginner, and it should not be the starting point when basic movement is uncomfortable.

First establish that you can move through the exercise without excessive tension, pain, or compensation. If you later add a light load, use it to improve control rather than to force a deeper range.

For example, a very light object may be used during a controlled wrist movement, provided that the load does not cause symptoms or make the movement jerky. Assistance from the other hand may also be used for gentle positioning, but avoid pushing aggressively into the end of the range.

Mobility work should remain manageable. If the exercise feels like a demanding strength set, the resistance, duration, or range may be too high for its intended purpose.

4. How to Add Wrist Mobility to Your Grip Training Routine

4. How to Add Wrist Mobility to Your Grip Training Routine

Wrist mobility can be included in several parts of your training schedule. The best approach depends on your current workload, the activities you perform, and how your wrists respond.

You do not need a long routine every day. A short sequence performed consistently may be more practical than an ambitious program that adds unnecessary fatigue.

Before Training: Prepare the Wrists

A brief mobility sequence can help you transition from inactivity into your planned workout. This is especially useful if you have spent a long time typing, gaming, sitting, or performing another activity before training.

Start with gentle wrist movements, followed by gradually more specific preparation for the exercise you intend to perform. For example, someone preparing for a loaded carry may practice comfortable wrist and hand movement before beginning with a lighter load.

A warm-up should gradually prepare you for the session rather than exhaust the muscles and connective tissues before the main work begins.

You can adjust the sequence according to the training session:

  • Use flexion and extension movements before exercises involving sustained wrist positioning.
  • Include controlled pronation and supination before rotational activities.
  • Practice gentle hand and finger movement before exercises that require prolonged gripping.
  • Begin loaded exercises with manageable resistance before progressing toward working intensity.

Mobility is only one part of preparation. Gradual loading, appropriate technique, and sensible training volume remain important.

After Training or During Recovery Days

Gentle wrist movement may also fit after training or on lighter days. The purpose is not to force recovery or eliminate every sensation of stiffness, but to maintain comfortable movement without adding substantial stress.

After a demanding grip session, you may prefer a few relaxed movements rather than a long series of stretches or loaded exercises. On a recovery day, you might use a short mobility routine as a break from prolonged sitting or repetitive hand activity.

Your response should guide the amount of work. If a mobility routine leaves your wrists feeling more irritated, reduce the intensity and range or leave it out while you reassess the situation.

Recovery days should create room for adaptation. They do not need to become additional training sessions disguised as mobility work.

Keep the Routine Short and Consistent

A beginner routine can be simple:

  • Choose two or three comfortable movements.
  • Perform each movement slowly for a manageable number of repetitions.
  • Avoid forcing the end range.
  • Keep the total duration short.
  • Observe how your wrists feel later that day and the following day.

You can gradually adjust the routine if it remains comfortable and fits your overall workload. There is no need to increase the number of movements simply because more exercises are available.

Remember that your wrists are also involved in other activities. Typing, gaming, lifting, climbing, manual work, and daily tasks all contribute to your total hand and forearm workload. Mobility training should be considered alongside those demands rather than treated as an isolated activity.

Optional Support Tools: Where KT Tape May Fit

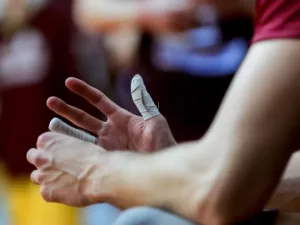
Kinesiology tape, including products from KT Tape, may be relevant to some people who want to explore external support or greater awareness of wrist positioning during selected activities.

However, KT Tape does not improve wrist mobility by itself. Tape may influence how supported or aware a person feels, but it should not be presented as a replacement for controlled movement, progressive strengthening, appropriate recovery, or professional assessment when needed.

If you choose to use wrist tape, keep several points in mind:

  • Use it as an optional support method rather than a requirement for mobility training.
  • Follow the manufacturer’s application guidance.
  • Avoid applying tape so tightly that it restricts comfortable movement or causes numbness, tingling, skin irritation, or changes in circulation.
  • Do not use tape to push through pain or conceal symptoms that are getting worse.
  • Remove it if your skin or wrist responds poorly.
  • Consider professional guidance if you are attempting to support a persistent or previously injured wrist.
5. Common Wrist Mobility Mistakes to Avoid

5. Common Wrist Mobility Mistakes to Avoid

Wrist mobility is generally most useful when it complements your training rather than competes with it. Several common mistakes can reduce its value or add unnecessary stress.

Forcing the range of motion: A deeper stretch or larger movement is not automatically better. Pushing aggressively into an uncomfortable position can make the exercise less controlled and may aggravate an existing problem. Work within a range you can manage.

Moving too quickly: Momentum can make a movement appear larger than it really is while reducing your ability to control the wrist. Slower repetitions allow you to notice how the movement feels and whether you are compensating elsewhere.

Treating mobility as a replacement for recovery: Mobility work does not cancel out excessive grip volume, insufficient rest, poor sleep, or repeated high-demand activities. If your overall workload is too high, adding more exercises may not solve the underlying issue.

Ignoring the rest of the arm: Wrist movement is connected to the hand, fingers, forearm, elbow, and shoulder. This does not mean you need a complicated full-arm routine, but it is useful to remember that movement and load are shared across multiple areas.

Changing too much at once: Adding daily mobility sessions, extra grip workouts, new equipment, and heavier resistance simultaneously makes it difficult to understand how your body is responding. Introduce changes gradually so you can identify what works for you.

Using mobility exercises to push through symptoms: Discomfort during a controlled movement should not automatically be interpreted as something you need to overcome. Persistent pain, swelling, numbness, tingling, weakness, or loss of function deserves more attention than simply modifying a mobility routine.

Build Better Wrist Mobility for More Confident Grip Training

Wrist mobility is one part of developing capable, resilient hands. It can help you explore movement, prepare for different activities, and become more aware of how your wrists contribute to grip mechanics.

The goal is not to achieve extreme flexibility or perform an elaborate routine every day. Instead, focus on comfortable movement, gradual progression, and consistency. A few controlled exercises may be enough to complement your existing grip training and provide a useful movement break during sedentary or repetitive activities.

Your mobility routine should also reflect your broader workload. If you train grip frequently, lift weights, climb, practice a sport, work with your hands, or spend long hours at a computer, your wrists may already be handling considerable demands. Mobility work should fit into that picture rather than add unnecessary strain.

If you experience persistent pain, swelling, numbness, tingling, unusual weakness, or reduced function, do not assume that more stretching or tape will resolve the problem. Seek guidance from a qualified healthcare professional so the issue can be assessed appropriately.

Build wrist mobility gradually, respect your current range, & use movement as a
complement to smart grip training, not as a substitute for recovery or proper care.

Key Takeaway

Wrist mobility supports controlled movement, effective grip mechanics, and better preparation for different training demands.

Keep your routine gentle and practical, progress gradually, and remember that mobility exercises should complement, not replace, strength training, recovery, and professional care when symptoms persist.

Thanks for Reading!

How Do You Currently Work on Wrist Mobility?
Share Your Thoughts in the Comments!

Need to Improve Your Grip? I'm Here to Help. As a fitness enthusiast, I explore grip strength, hand training, performance, injury prevention, & recovery to help you train smarter. Whether you're chasing a competitive edge, getting back from an injury, or simply looking for better ways to use & strengthen your hands, you'll find practical ideas & useful tools right here.

Leave a Reply

Your email address will not be published. Required fields are marked *